Pages

Showing posts with label information and resources. Show all posts

Wednesday, December 1, 2010

Tell-it Tuesday: How to prep Cow Patties Cloth Diapers

We know there were many purchases made over the Black Friday/Cyber Monday sale.  This post will tell you what you need to do with your new Cow Patties Diapers when you receive them and to make them as functional as possible as quickly as possible. 

Prep-wash all natural fibers (this includes hemp, bamboo, organic cotton, etc.) together the first few times and separately from everything else. Washing them separately from everything else ensures that the natural oils don’t cause repelling issues with the manmade fibers (fleece, microfiber, etc.). After the first few washes separately you can toss everything in together. 

Cow Patties Bamboo insert
What I do is wash and dry (to help them shrink, all natural fibers shrink about 10%)  separately the first two or three times and for the rest of the prep washes I just throw some Cow Patties bamboo inserts in whenever I do diaper laundry.
The natural fiber inserts need to be prep washed several times-the more you wash the more absorbent they become. Some people don’t initially like Bamboo because they think it’s not absorbent but in truth it can take 10-12 washes before Hemp, Bamboo, Organic cotton, etc. reach the maximum absorbency. Once they reach maximum absorbency they are much, much, much more absorbent than any manmade fiber.

Cow Patties Bamboo inner
If you have Cow Patties Diapers with the Bamboo inner -see picture to the left- (same with Bamboo wipes) since it doesn’t really work as an insert the covers/diapers don’t need to be prep washed all those times, just the inserts so that they reach their maximum absorbency.

Leaking seems to be a common occurrence around 3-5 washes and if you find that's the case for you don't fret, just wash them a few more times. 99.9% of the time this resolves the issue. If you continue to have leaking issues after 10-12 washes feel free to contact me or Megan and we will troubleshoot with you. 

If anyone has any questions regarding prep'ing your new Cow Patties Cloth Diapers feel free to comment on this post. 

Wednesday, October 27, 2010

Are you having issues with cloth diapers?

I reviewed the Cow Patties blog comments this evening and noticed that quite a few of you are having issues with your cloth diapers, some with stink, some with stripping, etc. Instead of emailing each of you individually, I thought it would be easier for all of you to contact me with the issues you're having. I'm willing to troubleshoot with you to try to resolve your issues. You can email me HERE, put "Diaper help" in the subject line if you wouldn't mind and I will answer emails in the order I get them. This will also help us determine what sort of problems and issues people are having and what we should post about. I also wanted to link you to a couple posts we've done here on the Cow Patties Cloth Diapers blog that you may find helpful:

-AIO, stripping, and Snappi-oh my! Your guide to cloth diapering terms
http://cowpattiescloth.blogspot.com/2010/08/aio-stripping-and-snappi-oh-my-your.html

-New to Cow Patties Cloth Diapers? Start here!
http://cowpattiescloth.blogspot.com/2010/09/new-to-cow-patties-cloth-diapers-start.html

-How to wash and lanolize wool
http://cowpattiescloth.blogspot.com/2010/09/tell-it-tuesday-how-to-wash-and.html

-All you ever wanted to know about wool and cloth diapering
http://cowpattiescloth.blogspot.com/2010/09/all-you-ever-wanted-to-know-about-wool.html

-How to resolve [cloth] diaper rash
http://cowpattiescloth.blogspot.com/2010/09/tell-it-tuesday-how-to-resolve-cloth.html

Oh, you can review previous posts by scrolling down a little bit and looking at the "Blog Archive" on the right-------------->
There are also things called "Labels" at the bottom of the page. If you scroll down and see something that interests you like "information and resources" or "giveaways" you can click the label and open up all the posts with that label.

I will work on a post for a future "Tell-it Tuesday" for resolving stink issues since that seems to be something that is plaguing many of you. If there is anything else you all would like to read about let us know and if you have any questions don't hesitate to ask!

Wednesday, October 13, 2010

Faces of Loss

When Megan decided she was going to donate part of the proceeds from this Friday's auction to Faces of Loss, Faces of Hope I contacted Kristin, the founder, and asked her if she would like to write something up for our blog. I told her our motivation for doing what we're doing this week- to raise awareness for Pregnancy and Infant Loss and to reach out to other mothers and families that may be suffering alone, in silence, and this is what she would like to share. I greatly appreciate her taking the time to write this up to share. If you haven't already, also read the post titled "Loss is not a four letter word" on this blog.
----------------

A look of shock, a gasp of horror. And then, “but you’re so young!”

I’m not sure if they expect me to be older, or more out of shape, or less attractive, or what. Certainly cute, outgoing, bubbly 24-year-olds don’t lose their babies, they must think.

I didn’t think they did either. Until it happened to me.

Four months ago, I was laying on an ultrasound table, my perfect little baby bump exposed and smothered with warm, sticky gel, trying to get my brain to comprehend what my doctor was saying. “There’s no heartbeat? I don’t understand what that means.” “You mean she’s gone? My little girl is dead?” It simply made no sense. I was six months pregnant. They told me she was perfect at my last appointment, less than a week ago.

I’m young. I’m healthy. How could this be?

The next morning I delivered my daughter. Stevie Joy, named after my dad. Nearly 2 pounds. 13 and a half inches long. 10 tiny fingers. Huge feet. The cutest button nose you’ve ever seen.

I left the hospital, got home, looked around, and thought, “now what?”

I can’t even put into words how alone I felt. Alone and ashamed, like I was some freak of nature. My friends were wonderful, but none of them could really ‘get it.’ Even my own husband couldn’t comprehend the pain I was feeling; he, after all, had not carried her in his belly for six months.

I went online to look for support, but what I found was mainly either stale, out-dated, and impersonal, or overly religious for my taste, filled with images of flashing cherubs and angel clip art. As if I didn’t already feel like enough of an outsider. “Where,” I thought, “can I go and just feel normal?” Am I really the only one out there?

I know now, that I’m not. I am far from alone. In fact, 700,000 other women go through the death of a baby every year, in the United States alone. That’s 2,000 women every single day, 80 “there is no heartbeats” every single hour. So why does no one talk about it? Why do we all feel so alone?

I decided I was going to do something about it, for myself, and for the hundreds of thousands of others like me, who are just looking for a place to connect, who are just looking for a place to grieve openly and honestly with others who ‘get it.’

Along with my friend, Andrea, who also lost a baby, her son Oliver, when she was 19 weeks along, I started a website/organization called Faces of Loss, Faces of Hope (
www.facesofloss.com). Faces is basically a collection of miscarriage, stillbirth, and infant loss stories, categorized and searchable by type of loss, stage of loss, location, and keywords, so that visitors to the site can easily find stories similar to their own. Along with each story, there is a head shot of the author. Faces has only been up and running for a couple months, but there are already over 400 stories and photos featured on the site. It’s incredibly striking and powerful to see so many beautiful, diverse faces, all in one place. They are the faces of your neighbor, your co-worker, your sister, your friend.

We have launched our new campaign called I AM THE FACE which runs through October 15th, which is National Pregnancy and Infant Loss Remembrance Day.  Our goal is to have 2,000 women who have lost a baby add a picture of their face to the site, to represent the 2,000 women who lose a baby every single day in the US. The goal is to ‘put a face’ on pregnancy and infant loss, and let more women who are suffering in silence know that they are not alone, and have no reason to be ashamed.

We are hoping that this becomes a movement, that those who have experienced a loss start thinking of themselves as survivors. You can really feel a sense of new found pride radiating from the women who have joined the campaign already. Yes, they are sad, but they are proud to have survived one of the worst things that can happen to a person, and proud to speak of the children they have lost and who have touched their lives forever.

To join the movement, please go to
www.iamtheface.org. You can also read stories of loss and hope, and share your own at www.facesofloss.com.

You can read Stevie Joy's birth story at http://www.facesofloss.com/2010/07/kristin-mom-to-stevie-joy-stillborn-on.html

Loss is not a four letter word

This is a very special week for Cow Patties Cloth Diapers. October 15 is Pregnancy and Infant Loss Remembrance Day.

In addition to being cloth diaper addicts and having toddlers about the same age, Megan and I have something else in common. We have both lost babies. I won't go into detail about Megan's loss but I would like to share my loss with you soon and Megan will share hers in her own time.

We both have our own reasoning and feelings for doing what we're doing this week but both of us agree that many people view the loss of a baby-whether miscarriage, stillbirth, SIDS or something else- as taboo. People on both sides wonder how they're suppose to feel or act. People are unsure how to talk about or bring up pregnancy loss, people don't know how to provide support and comfort to the people that have experienced the loss-especially the Mother and often times the family suffers in silence unaware of support or resources available to them. Well meaning people end up doing more harm than good because they say insensitive things or do not mention the Baby's name for fear it will hurt the parents more. The parents, especially the Mother, feel isolated and alone unsure about how to cope as she bleeds alone at home knowing her pregnancy is over or leaves the hospital with empty arms after handing her sweet stillborn baby over to a doctor or nurse. They both wonder why and how they're going to survive the next hour without their baby let along the rest of their lives. They struggle to cope, struggle to reach out, struggle with a million questions they'll never have answers to, they think they are alone.


The truth of the matter is:

-10%-25% of ALL CLINICALLY RECOGNIZED PREGNANCY WILL END IN MISCARRIAGE. Chemical pregnancies (I hate that term-it sounds so clinical), like mine, account for 50%-75% of all miscarriages.(1)


-STILLBIRTH OCCURS IN 1 OF 160 PREGNANCIES(2)


Pregnancy loss does not discriminate.

You could have done everything right before conceiving and during the pregnancy, be in best life circumstance possible, of any ethnicity, any age, and still experience loss. Chances are if you haven't experienced loss your mother, sister, best friend, sister-in-law, mom behind your favorite WAHM business, or Barista at your favorite coffee shop HAS


That is why Cow Patties is taking time to week to help bring to light Miscarriage, Stillbirth and Infant loss. In addition to blog posts this week discussing loss Megan has been working her heart out to create diapers for a very special auction this week. In-lieu of her normal stocking she is going to auction off her products and donate the proceeds to Now I Lay Me Down to Sleep and Faces of Loss, Faces of Hope. These are just two of the most amazing resources for people that have experienced loss and I urge you to check them out along with the link to October15th.com. I will be profiling Kristin of Faces of Loss, Faces of Hope later today as well-very personal and very informative piece so be sure to check it out.


Even if you haven't experienced loss please read the "Helping the Bereaved" section on Now I Lay Me Down to Sleep and the "Friends and Family" section on Faces of Loss Faces of Hope. Your support and your shoulder will mean more to the Bereaved than you will ever realize.

If you have experienced loss YOU ARE NOT ALONE! It is not a path you have to walk alone. We hope that we are able to provide you with resources and information that will help you heal. I am also available by email if you need someone to talk to or need help finding a specific resource or information.

Broken-by Lifehouse

References

Wednesday, October 6, 2010

Tell-it Tuesday: How to make edible play dough

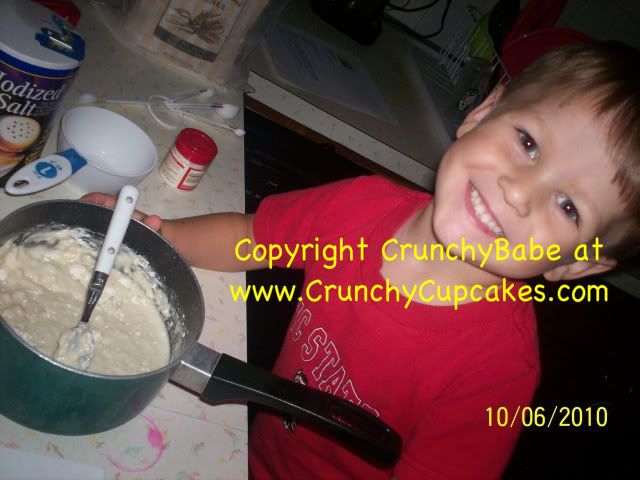
Sorry this is a day late-seems to be the theme of my week so far--but seriously, how can you frown with this is staring back at you....


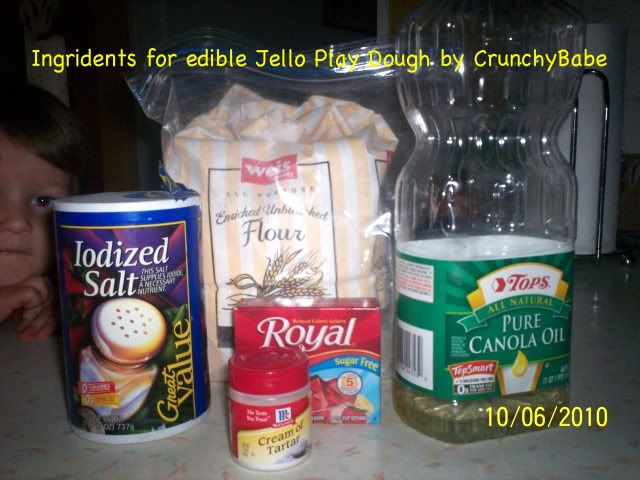
On my hunt for ways to be frugal I found quite a few ways to make homemade play dough, some edible and others...eh, not so much. Today I'm going to tell you how to make the Jello play dough pictured above. Jello play dough is completely edible, which is good if you have younger kids that like to explore taste and textures with their mouths or dogs that will run to eat any little piece of anything that drops to the floor. It was quick and easy to do and the kids loved the whole process but especially the playing after it was done.

INGREDIENTS:
1 cup flour
1/2 cup salt
1 cup water
1 tablespoon cooking oil
1 teaspoon cream of tartar
1 package of Jello (or generic brand) powder.


HOW-TO:

(1) Combine flour, salt, water, cooking oil and cream of tartar in cooking pot. I used a rather small simmering pot. Mix until well blended.

(2) Add 1 package of Jello powder* to the mixture and place in on a medium-high burner. Cook stirring the whole time, until dough has thickened to the consistency of mashed potatoes. I stirred a couple of minutes.

(3) Remove from the burner and let cool before kneading. You may knead to flour your hands before kneading, but I didn't.

(4) Knead, pass to kids and let them enjoy! The more you knead and play with it the more it looks like store bought play dough.

To save it you can store it in a Tupperware type container, or in a Ziploc bag with all the air squeezed out. I put it in the bag and put it in the fridge but you don't have to. If it dries out just add a little bit of water.


*Edited on 10/20 to add:
I made this recipe this morning but left out the Jello. I added a few drops of food coloring to the cup of water (I measured 1/2 cup, added the food coloring, added the other 1/2 then dumped it into the pot) and made a couple batches of play dough successfully. Each batch had a nice color to it because of the food coloring. It hasn't stained hands either and it's just as edible though it probably doesn't taste as good as it does when you add the Jello.
 
Also, stored in the Ziploc in the fridge our play dough was still good-just as soft- two weeks later.

Friday, October 1, 2010

Big Cow Patties Cloth Diapers NEWS!

The big Cow Patties news is..........No, no one is pregnant. I don't know about you all but whenever I start out with "I have something to tell you" or "I have news!" the first thing someone says is "YOU'RE PREGNANT?!?" Uh, no!

Megan has decided, on the urging of a board she is a member of, to do a co-op (cooperative) for her Famous Pocket Fitteds!

The co-op manager is named Melissa. To put it in the simplest form I can think of, Melissa approached Megan and asked her if she would give a price cut if Melissa could get a group together that would make a bulk purchase from her.

Typically  the Famous Pocket Fitteds are $18.00. Through this co-op Megan has dropped the price to $15.00 and that includes shipping! That price is for any size Famous Pocket Fitted and also includes snaps if you want them.

Famous Pocket Fitteds are made out of 2 body layers of bamboo fleece with a cute outer fabric (flannel, cotton knit, cotton woven). Insert folds up for 10-12 layers of absorbency. Requires a cover, pins, snappi, or snaps (upon request) to close. These are a great option for night time and/or heavy wetters. FPFs have the great fit and the absorbency of a fitted but the reduced drying time of a pocket.

You can read more about the specifics of ordering customs, including sizing, etc.) HERE.
To see the fabric options click on the type of fabric you're interested in: Flannel -- Cotton Knit -- Cotton Woven to view the albums of in-stock fabric on the CP facebook page. There is also the option of sending your own fabric.


Co-op details:

-Megan has put the co-op max at 50 diapers total. However, she's willing to bump that up a bit if there is a lot of interest (and there definitely IS, 29 diapers today already!) but to ensure you get the number of FPFs you want, put your order in early...there is no limit to the amount of FPFs you can order.

-Ordering will run today (October 1) through October 25 and payment will be due at that time. No orders will be changed after that point.

-Megan will begin working on the co-op order November 1st. She will not be doing custom orders or stockings while she works on the Co-op order.

-Orders will be shipped right to the buyer from Megan (Cow Patties Cloth Diapers) so make sure your shipping address is correct in your PayPal account. Cow Patties Cloth Diapers can not be responsible for orders shipped to incorrect or old Paypal addresses.

If you're interested you can let Melissa (the co-op manager know) by EMAILING HER. If you have co-op questions you can also email Melissa, and as always you can post on the Cow Patties Cloth Diapers facebook page, as well as email me or Megs.

To put in a Co-op order with Melissa you'll need to have this info:
-Name and screen name (if you're part of the board)
-Email and Paypal email (if it's different than the email you use to communicate)
-Number of Famous Pocket Fitteds you would like
-Fabric choice(s) from the albums I linked you to above
-If you want snaps you'll need to specific and let her know what color

Tuesday, September 28, 2010

Tell-it Tuesday: How to resolve [cloth] diaper rash

Rashes with cloth diapers are less common than rashes with disposables but on occasion you may find yourself battling a rash. Though not a complete or extensive list I'll discuss the more common types of diaper rashes and somethings that may help you to resolve them:
-Sensitivity rash
-Heat rash
-Eczema
-Yeast rash
-[Urine] ammonia burn or chemical burn
-Allergy ring (Perianal dermatitis)
-and the less common but still worth mentioning Bacterial rash
In order to treat it properly must first diagnosis it properly. If this is your first time dealing with the rash I suggest having your doctor look at it.

-Sensitivity rash (Contact dermatitis): Contact dermatitis is a rash caused by a sensitivity to something on the skin, it could be sensitivity to material or fabric used, diaper area cleaner (or store bought wipes), soaps, detergents, urine,  poop etc.
The only way to resolve and prevent Contact Dermatitis is to find what is irritating your child's skin and remove it completely. You may also find something like Benadryl or Cortisone cream helps relieve symptoms. Your doctor may also prescribe a cream to apply as well.
If it is irritation from urine change baby more frequently and consider using microfleece liners. *Microfleece works as a stay-dry liner allowing moisture to move through it but not back up and keeps your baby drier. You can find microfleece liners already cut and available for sale at some cloth diaper retailers, or you can buy microfleece (not thicker fleeces as it can  cause repelling issues) and cut them yourself. I have also found that a cup or so of Baking Soda in a bath of warm water, filled just enough to cover the diaper area, can help sensitivity rashes. I would put Kadie in a baking soda bath in the evening and by the next morning the rash would be almost totally gone. Some people also make a paste out of baking soda and water and apply it directly to the rash. Baking soda is completely safe for use with cloth diapers.
Google Health as a very informative article on Contact Dermatitis.
-Heat rash: Is skin irritation caused by excessive sweating during hot weather. It's more common in young children and looks like tiny red pimples or blisters clustered together in certain areas of the body, including the groin.
The best way to treat heat rash is to keep the Baby in a cooler, less humid atmosphere. You may notice symptoms improve when you lower the Baby's core body temperature with things like cool bath or things like Popsicles.
In addition to frequent diaper changes, you may find a sprinkle of cornstarch (which you should not use if you suspect yeast infection) or scorched flour will help keep Baby drier which may help relieve the rash. Trimmer diapers, like an AI2 symptom may also be a better choice than thicker diapers, stay-dry liners (as mentioned above* ) may help, as well as non-PUL covers like wool or fleece (this is when you would want the thicker fleeces) soakers.
-Eczema: I have very little knowledge about Eczema so I'm going to refer you see your doctor and research it on sites like Google Health (here), WebMD (here), and KidsHealth (here).
-Yeast rash: eMedicine health has a very information article on diaper related Yeast Infections but in a nutshell-Yeast loves warm, moist environments, can come on quickly, and be a pain to get rid of. You may find using one type of insert or another contributes to Yeast Rashes, or that your baby gets a yeast rash after going overnight in the same diaper.
Normally an anti-fungal cream is necessary to completely kill the rash, some doctors will also prescribe oral medication. There are prescription medications for yeast, as well as over-the-counter remedies like Monistat but before you begin treatment for Yeast Infection in the diaper area check with your doctor. Some people also swear by natural/home remedies but I have no experience with those so I'll stick to what I know. You may find a a cup or so of Apple Cider Vinegar in warm bath with just enough water to cover the diaper area will help relieve symptoms but you should not do that if the skin is open at all.
We battled recurrent Yeast Rashes with Kadie for a couple months straight because I could not kill the yeast. I cannot stress enough that it order to completely kill the yeast and stop it from re-infection you MUST (absolutely must) kill the yeast completely in the diapers. I've seen all sorts of crazy combinations of things people have washed their diapers and cloth wipes in [trying to] kill the Yeast. My recommendation is Bleach-yes, I said it BLEACH and wash everything-inserts, covers, liners, wipes...
I used regular chlorine Bleach on everything white including inserts, and non-chlorine bleach on everything else. I washed in extremely hot water, if your water isn't hot enough add a pot or two of boiling hot water to the water in the washer, at the recommended amount of bleach, then add the cloth diapering stuff, agitate for a little bit, soak and then complete the washing cycle. If the diapers are dirty (meaning you didn't just pull them out of your stash to wash them in the bleach) after the initial bleach cycle wash as you normally would wash dirty diapers and if you don't do an extra rinse add one.  For everything not white I used Walmart's brand of Chlorine-Free Bleach and did the same thing. Bleach was efficient, and effective-I only had to soak/wash everything once in bleach to rid Kadie of the yeast.
Some people also swear by raw silk liners to reduce/prevent diaper related yeast infections.
-[Urine] ammonia burn or chemical burn: [Urine] Ammonia burn can be very common in diapered child. Ammonia burn or chemical burn can vary from mildly red and irritated  to severe including crusty and or/open, bleeding, blisters or worse.
The urine ammonia burn is usually started by infrequent diaper changes, including the Baby sitting too long in a poopy diaper or acidic poop touching Baby's skin. You may notice this rash, in addition to the Allergy Ring rash I'll discuss in a minute or by itself.  You may find the Baking Soda Bath (mentioned above) helps relieve a Urine Ammonia rash as well as more frequent diaper changes, and traditional diaper creams.
According to Wikipedia.org: "A chemical burn occurs when living tissue is exposed to a corrosive substance such as a strong acid or base. Chemical burns follow standard burn classification and may cause extensive tissue damage. The main types of irritant and/or corrosive products are: acids, bases, oxidizers, solvents, reducing agents and alkylants."
You may be familiar with how the term Chemical Burn relates to diapering because of this year's issue with Pampers and their new Dry Max diapers (more info) or the recall of Rockin' Green's Hard Rock version of their detergent in July (see here). Whatever the case, if you suspect chemical burn on your child stop the use of whatever you may think may be causing the burn, rinse with plenty of water and get thee to a doctor for appropriate diagnosis and treatment. You may also want to add an extra rinse cycle at the end of your cloth diaper routine and/or switch detergents if you're using one (like Charlie's Soap with a higher rate of chemical burns). If you're looking to switch I highly recommend Lulu's in the Fluff Glamour Wash. I have been using their Hard Water version for most of the year and have never had an issue with Kadie's very sensitive skin.
-Allergy ring:  According to DrSears.com "a variety of foods can irritate baby's bottom, especially acidic foods such as citrus and tomato-based sauces. Appearance - a red ring around baby's anus. Treatment - discontinue suspected foods. Breastfeeding moms may need to eliminate foods from their diet." Sums it up pretty well.
-Bacterial rash: A bacterial diaper rash is typically a secondary infection that starts after Baby's skin is already compromised. According to WebMd.com "Look for yellowish, fluid-filled bumps ("pustules") and honey-colored, crusty areas, which are symptomatic of a bacterial infection (like staph or strep) and require antibiotic treatment."


In terms of diaper rashes there are a few things that I have discovered:
(1) Instances of diaper rashes have been far less since we've been using cloth diapers.
(2) Changing baby frequently-no matter if your using disposables or cloth diapers is crucial in preventing most types of diapers rashes. "Nakie" time helps too.
(3) Using creams does NOT mean you HAVE to use disposables! I have used several different creams (including Monistat, prescription yeast cream, as well as supposedly safe and definitely not cloth diaper safe creams) and as long as I've used liners (either Bummis Bio-Soft Flushable Liners or reusable/washable microfleece liners I have not had an issue with repelling.
Read the label-if the cream as ANY proprieties which are water barriers by nature use a liner. I couldn't possibly name all the supposedly diaper safe creams out there but I can tell you from personal experience Grandma Els Diaper Rash Remedy and Prevention is NOT completely cloth diaper safe. Grandma El's had two ingredients-Yellow Petrolatum and  Lanolin- that are water barriers by nature. If you use it (it works great, smells even better), use a liner or two. If you're looking for truly cloth diaper safe cream I recommend trying  Northern Essence. I have used both there Sensitive Diaper Salve and their Better Butt[er] cream without liners and have had no  issues on my cloth diapers. The Diaper Salve has been really great for preventing diaper rashes.
(3) If you use creams and reusable/washing microfleece liners you absolutely must was them separately from all your other cloth diaper laundry or else the barrier ingredients can spread and coat your cloth diaper and accessories and you could have issues with repelling.
(4) Pleasantly Plump babies with "rolls" can have issues with rashes/chafing caused by their skin rubbing together, called Intertrigo. Cornstarch (which you should not use if you suspect yeast) or scorched flour can help with that, the Northern Essence Diaper Salve has been really great for that as well. This isn't necessarily in the diaper area rash which is why I didn't add it to the list but felt is was still worth mentioning since it can be in the thighs which people may think is some sort of diaper rash or irritation (as well as neck, belly, etc).
***Disclaimer: I am not a medical professional of any kind. The information written above was written for informational purposes based on my knowledge and personal experiences. It is not intended to be used for diagnosis or treatment and neither Cow Patties Cloth Diapers or Crunchy Babe with CrunchyCupcakes.com can be held liable for anything related to this article-use at your own risk. Though the things listed above have worked for me/my children they may not work for you/your child and no results are guaranteed.When in doubt, I suggest you contact your child's health care professional about an accurate diagnosis and a treatment plan that will work for his/her specific issue. This article is not meant to be a complete or extensive list of all diaper rashes or all treatments.***

Thursday, September 16, 2010

All you ever wanted to know about wool and cloth diapering

On my forever quest for knowledge, I had the pleasure of interviewing Christine, owner of Knoodle Knits and Erin, owner of Wooltopia for this post. I hope you find them as informative as I did. If you have any questions don't hesitate to post a comment and I'll work on getting answers for you.

You may also want to view our post HERE on how to wash and lanolize your wool products.

Crunchy Babe (CB): What is Wool and how does it work for cloth diapering?

Knoodle Knits (K): Wool is a natural protein fiber that comes from sheep. If you look at it under a microscope, you will see that it is covered by interlocking scales (the cuticle). This structure, combined with the sebaceous grease that coats the fiber as it emerges from the follicle (lanolin), is what makes wool water repellent. However, water repellency is only one of the reasons that wool is used for cloth diaper covers.

CB: Why and how is it used in cloth diapering?

Wooltopia (W): Sheep make an oil on their skin called lanolin. When there is lanolin on the wool, the wool is very water resistant.  During the cleaning process most of the oil is washed out, but you can 'lanolize' your wool with a liquid lanolin.  However, wool is also naturally absorbent.  It can absorb up to 30% of it's own weight without feeling damp.  In addition, wool is naturally anti-microbial so when it soaks up urine it won't get a urine smell!

Wool is all natural, whereas PUL is synthetic.  Wool is breathable, whereas PUL is more plasticy and holds the moisture in.  Wool won't delaminate or wear over time in the same way as a PUL diaper.  PUL needs to be washed after each use whereas wool only needs to be washed every 2-3 weeks!
KK: Aside from water repellency, there are several other factors that contribute to the success of wool as a cloth diaper cover. 

Wool is environmentally sustainable. If you are cloth diapering you are already contributing to global change. But did you know that using wool products supports local farmers throughout the world? Most wool is produced organically or with low use of harmful chemicals. The processing of wool requires very little environmental impact compared to other natural fibers or man-made fibers. And, wool can be reused multiple times, and even up-cycled when it is no longer needed for it's original purpose.

Wool breathes, meaning it is hygroscopic; able to absorb and release moisture as needed. In fact, most wool fiber can absorb up to three times its weight in moisture. That moisture then evaporates back into the air. This evaporative process gives wool a natural cooling and heating system, keeping sheep (and humans) warm and dry. When used as a cloth diaper cover, it wicks moisture away from your baby's skin. Keeping baby's bottom dry is key to preventing diaper rash. It is the reason why you CAN use wool in the the summer months. It is also the reason why wool is a better choice than PUL, for cloth diaper covers. PUL (polyurethane laminated fabric) is basically plastic backed fabric. While PUL is waterproof and can be autoclaved (sterilized in extreme heat), it does have a few drawbacks. PUL is designed to trap moisture and prevent it from leaking. Since PUL does not wick, moisture stays trapped against baby's skin, which can lead to irritation and rashes. PUL also traps heat in the same fashion that a disposable diaper does. It does not have the same temperature regulating properties of wool, therefore in the summer months a child can become warm from wearing a PUL cover versus a wool cover. Finally, PUL is not biodegradable. The process for manufacturing PUL covers is not environmentally friendly (it's actually quite toxic), and relies on the availability of our already taxed petroleum resources. 

Wool is very poor at conducting static electricity, therefore, it is the least likely fiber to attract dirt and dust. Even dust mites hate wool. This is great for allergy sufferers, or those with sensitive skin. In fact, if someone is allergic to wool, it is likely not so much an allergy, as it is a hypersensitivity to the texture of the scales scratching on a person's skin. 

Wool is naturally antibacterial, anti-fungal and antimicrobial.  Wool inhibits the growth of microbes because those things tend to be attracted to smooth, positively charged surfaces, like those of synthetic fibers, rather than the scaly, neutrally charged surface of wool. This means that even with heavy use, wool diaper covers usually do not have ammonia build up, or other bodily odors, as they are both caused by bacterial growth. Wool will not trap and retain odors from outside sources either (pets, smoke, food), a simple 'airing out' is all that is needed. Finally, frequent washes are not necessary. Unless the garment is soiled (poop), stained, or has gone through several soaking wet diapers, you can simply leave it out to dry for a few hours.

Finally, wool is flame and fire resistant. The wool fibers are structured in such a way that if exposed to flame, they will smolder and try to extinguish themselves. Which is why wool is used to make fire blankets, rugs, curtains, bedding, mattresses, and other upholstery. This also makes it a great choice for infant and children's clothing.

CB: What are the different types of wool related to cloth diapering?

W: The wool typically used for cloth diapering comes from sheep.  They are many different types (i.e. merino, corridale, blue faced leiceister)  Each different type, or brand, will have different qualities.  Merino is extremely soft, but doesn't hold elasticity as well. 

KK: One of the other great advantages of using wool as a cloth diaper cover is that there are so many options available. First, let's look at the different manifestations of wool, including interlock, knit, and up-cycled products. Then, we'll discuss the different types of garments that can be made with these variations on the wool fiber.

Wool interlock is a knit fabric that comes in varying percentages of wool. For cloth diapering you want to find garments made from 100% wool interlock, or a 97% wool and 3% lycra blend (lycra adds some stretch to the wool). Since this type of wool behaves like fabric, it can be cut and sewn into a variety of different garments, and can take on the look of 'regular' clothes. 

Knit garments are produced by knitting or crocheting wool yarn. It is important to use 100% wool yarn when making cloth diaper covers, as synthetic fibers can inhibit the very properties that make wool so successful. There are several different types of wool yarn; Merino, Cormo, Rabouillet, Cestari, Corriedale, Blue Faced Leicester, to name a few. What you use can be a matter of personal preference, although some are softer, some are more sturdy, and others have more of a luster and take dye well. You can also choose to use mass-manufactured wool or small production hand-dyed, hand spun wool.

Up-cycled products are cloth diaper covers made from recycled sweaters. Old sweaters are cut and sewn, just like interlock, to produce a variety of wool garments. These covers can be made from any type of wool, including Cashmere. Sometimes, if the original sweater is too 'holey' or loosely knit, the garment is felted (purposely shocked by shrinking and and locking the fibers together irreversibly), then cut and sewn.
 
There are so many cute ways in which wool has been used to make cloth diaper covers. There are six basic garment choices available; longies, shorties, skirties, soakers....all of these items can be referred to as "woolies".

Tuesday, September 7, 2010

Tell-it Tuesday: How to add a linkable, click able, steal-able button to Blogger blogs

The very first step in making a linkable, click able, steal-able button with text box is to have an image to use as a button. Most often buttons like this are 125x125. I think that's a pretty safe standard-you want to make sure they fit in someone else's blog sidebar.

I took the original Cow Patties Logo from the facebook page added some color and edited it to fit into a square (well, actually it's not quite a square but close enough). For my personal blog button I took coordinating colors and images from my template to incorporate into my button. The possibilities are endless, just make sure it's easy to read at 125x125.


Once you have the image you want to use as a button you need to upload it to a hosting site. There are more out there than I can name off but I use http://www.photobucket.com/ for all my photo hosting. It's easy, I like their privacy setting too. I even ((gasp)) pay them extra money for a "Pro" account. I think it's well worth it, but then again I do host a lot of photos, it may not be a good value for you. http://www.tinypic.com/ is another popular one. I will be using PhotoBucket in my examples but as long as you upload to a site that gives you the direct code to your image you'll be able to use it. Places like Picasa are popular but, like I just dealt with late last month, you have to dig around in the embed code for the direct image code which can be a pain.


So, so far we have:
Step 1: Get an image to use as your button, 125x125.

Step 2: Upload that image to an image  hosting site like Photobucket.com


Once you have your image created and hosted continue on...


Step 3: Go into the Dashboard of your blogger blog and click on "Design"

Step 4: On your Page Elements page click "Add a gadget"

Step 5: When the Add a Gadget box pops up select "HTML/JavaScript"

Step 6: Give the box that pops up a title. "Grab our button!" is what we use but you can put in anything, or nothing at all...it's up to you. After you pick  a title paste this code into the box:
 <center><a href=http:// LINK TO YOUR SITE title="TITLE OF YOUR SITE"><img alt="TITLE OF YOUR SITE" src="http:// DIRECT LINK TO YOUR IMAGE" /></a> <center>


</center>


<center><textarea id="code-source" rows="3" name="code-source"><center><a href="http:// LINK TO YOUR SITE"><img border="0" src="http:// DIRECT LINK TO YOUR IMAGE" /></a></center></textarea></center></center>
 
Step 7:  Replace my color coded stuff with your correct information. The direct link of your image will start out with http:// and end with something like .jpg. If you use any other code, like the HTML or image code it will not work. It's very important that you have the entire link and that you do not delete or move any of the " " marks as you're trying to paste inside of them. To make it easy for you I've color coded the different information. Orange is the link to your  site. Looking below you will see the link to the Cow Patties Cloth Diapers blog is in those areas. Green is the title of your site. You'll see ours says Cow Patties Cloth Diapers. Purple is the direct link to your image on the image hosting site. It'll look like this when you're done:


Step 8: Click "SAVE" and look for the tittle of your box. You can move your new box where you want it to be by clicking on it, holding the mouse, and moving. In the image below I was in the process of moving it.


Step 9: When you get it to the position you want it click "View Blog" toward the top of the page and see how it looks. You should see something similar to this:


Anyone can copy the code in the box, paste it into their blog to get your button that automatically links back to your site. Click and  see...


Saturday, September 4, 2010

Custom Orders Announcement

Starting Tuesday, Sept 7, 2010 Megan will be taking on a limit of 10 custom orders a week (depending on the sizes of the orders) and 2 blog review and/or giveaway orders.

Beginning at that time you will be able to check the status of your custom order right here on the blog. Find the words going across the top of the screen and click on "Custom Order Status" shown below with a bright pink box around it. Another page of the blog will open and orders will be listed in alphabetical order by first name. Once your done you can click home to go back to the main page of the blog by clicking "Home".


As always if you have questions or concerns you can email me  or Megs at any time.

Tuesday, August 31, 2010

Tell-it Tuesday: How to make Summer Squash puree for baby [food]

Every week I'm going to post a "Tell-it Tuesday" entry to walk you through how to do something. Most of the time it'll relate to attached/natural parenting but I'll throw in other cool things I've learned how to do occasionally too. This week I'm going to show you how to make Summer Squash Puree for baby. Next week I'll post a "how to" for all your Bloggers out there...something that I've gotten a lot of requests for lately.

I really enjoyed home making baby food for our son so naturally I really wanted to do it for Kadie too. I wrote up this tutorial as the Summer was winding down last year and the seasonal Summer foods were on the verge of going out of season. With a lot of good foods in season over the Summer I wasn't sure if I should freeze the foods whole or make the puree and then freeze. I decided to make the puree and freeze. The storage time in a freezer part of a refrigerator is 3-4 months, in a deep freezer it's even longer.

I have both Super Baby Food and  The Petit Appetit Cookbook. I would highly recommend both books, but wouldn't pay full price for Super Baby Food. She's very frugal but if you can look past that the book is jammed back full of information. The Petit Appetit Cookbook is simpler, with the basic information on home making baby food, and has some really, really great recipes that go on through toddler hood in a very easy to read format with nutritional information right on the page.

I decided to follow the instructions in The Petit Appetit Cookbook for Summer Squash Puree (pg 72). If you're not going to us in-season/local foods I highly suggest using frozen because it's picked and frozen at it's peak.

In my arsenal:
To prepare-
-2 squash (We get ours from Cross Creek Farm in our town.)
-cutting board
-sharp knife
-plain Jane, run of the mill food processor from Hamilton Beach
-pot
-steamer basket
-toothpick (to test for done-ness)
<-tongs (to remove squash if steam is too hot to grab steamer basket)
-spoon

To freeze-
-two plain Jane, run of the mill ice trays. They make "fancy" ice trays just the purpose of freezing baby food but I used two that we use for ice already.
-aluminum foil
-freezer bag(s)
-permanent marker


The recipe:
3 large organic summer squash, cut into 1-inch-thick rounds (about 4
cups).
Steamer Method (there is a microwave method also but you'll have to buy the book for that one): Place and prepare squash in a steamer basket set in a pot filled with about 1 to 2 inches of lightly boiling water. Do not let water touch squash. Cover tightly for best nutrient retention and steam for 7 to 9 minutes, or until squash is tender. Squash should pierce easily with a toothpick.Squash does not need to be peeled. Puree in a food processor with a steel blade. Additional liquid is not usually needed.

What I did:

- I set-up the pot with the water and placed the steamer basket inside.
For those not familiar with a steamer basket it looks like this...we bought it at either Target or Walmart for a few bucks, I don't remember.
-I had 4 squash, I only used two.
-I scrubbed them with a vegetable brush, then cut the very top and bottom off (and gave them to our guinea pig) and cut the rest up into circles, like the recipe said
-I transfered the cut pieces into the steam basket inside the pot
Covered and let steam on "8". I had to nurse Kadie so when they skin was quite easily pierced with the toothpick at 9 minutes I turned off the burner and went to nurse her.
-When I came back they were almost falling a part. It was still too hot to reach in and grab the steamer basket so I picked the pieces up using tongs and put them in the food processor cup. I filled it up half way
-Then pureed it on "2" until I thought it looked like baby food (scientific, I know!)
True to the recipe I did not need to add any extra water, but in case you do you should keep the water that you cooked in that way you put whatever nutrients escaped through cooking back into the food.
-I scooped the Squash puree out of the food processor and into the ice trays.


-The half processor cup full made one tray, so I wrapped it tightly with aluminum foil and put it in the back of the freezer and repeated the process for the rest of the Squash in the pot.
-Once they froze (it took longer than freezing normal ice cubes) I removed them from the ice trays
and put them in sandwich bags labeled with the consistency (if necessary). I got three bags of 7 cubes and put the three sandwich bags into a gallon freezer bag that I labeled with the name of the food and date. There are a bunch of different ways you can freeze food, but like I said I prefer the nesting bag method using instructions I learned from Super Baby Food.